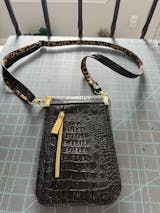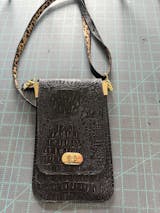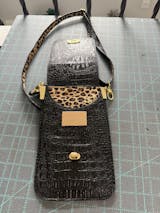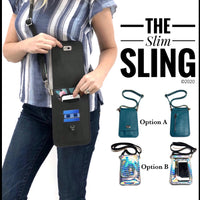


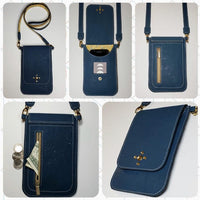

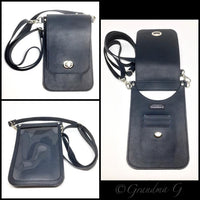


Slim Sling PDF Sewing Pattern (includes SVGs, A0 File, Projector File and Video!)
This listing is for a DOWNLOADABLE PDF pattern only! If you want to make your own Slim Sling, you're in the right place. You are NOT buying a completed bag. By purchasing this pattern Linds Handmade LLC grants the purchaser a non-exclusive, non-transferable, simple right of use license to use the sewing pattern for personal or limited commercial use. The rights to reproduce, publish or distribute the sewing pattern in whole or in part, to allow third parties to use it, to edit it or to change it in any form is strictly prohibited. Commercial use is limited to individual brand sales and is prohibited for mass production or manufacturers.
With this purchase you will receive an instant download PDF pattern with full pattern pieces, detailed pictures, and step by step instructions on how to make your own minimalist cellphone purse. This pattern is designed to be used with any self-healing textile such as cork, leather, vinyl etc as the edges are left raw (with the option of using edge paint to finish off the edges.) Do NOT try making with cotton fabric! If you want to use your cotton fabrics, we suggest our Fab Sling pattern which was designed specifically for quilt cottons.
This is an intermediate pattern, in that it requires accurate cutting and sewing since the edges are left raw and accuracy will make all the difference in the overall end look. This is not recommended for someone brand new to sewing. You should be comfortable using a quilting ruler and rotary cutter or sharp knife (ie box cutter or Exacto knife) for cutting straight lines. We’ve included dozens of pictures to accompany each step, as well as cutting measurements if you prefer not to print out any of the pattern pieces.
Specs: Finished purse is approximately 5” wide by 8” tall. There are 2 style options. Option A offers a zippered back pocket and option B offers a clear vinyl window on the back to see and use your cellphone without taking it out. Both options have 3 recessed card slots, hidden and secured under the front flap.
To get started, you will need the following supplies:
-3 sqft of leather (plus length for body strap) or ¼ yd cork/vinyl (more if print is directional)
-¼” yard accent fabric (for option A and if doing a 2 tone strap).
-(1) ⅝” strap adjuster (or ½” will work)
-(2) ⅝” swivel clasps (or ½” will work)
-(2) side anchors (or ½” D rings, the smaller the better)
-(2) small double cap rivets (optional)
-21” of 2 ½” wide ribbon (or very lightweight fabric)
- 5” zipper for option A (cut 6” if using zipper by the yard)
-(1) Small purse lock (or spring snaps with setting tool)
-14 or 16 gauge clear vinyl 5 ¼”x8” for option B
-Fray check or lighter
-Marking pen
-¼”Double sided tape
-Rotary cutter and ruler
-leather edge paint & applicator (optional)
-spray adhesive
-leather glue, fabri-tac, or rubber cement
-small screw driver (if using purse lock or side anchors)
-wonder clips
-sharp scissors
-rotary leather punch or 5/32” hole punch (optional)
-iron
Be sure to subscribe to our Youtube channel and join our Facebook group “Linds Handmade Designs” to show off your creations!


